Customer records are the foundation for contacts, groups, purchase orders, invoices, portal access, and campaign reporting. Create the account cleanly first so everything attached to it stays organized.
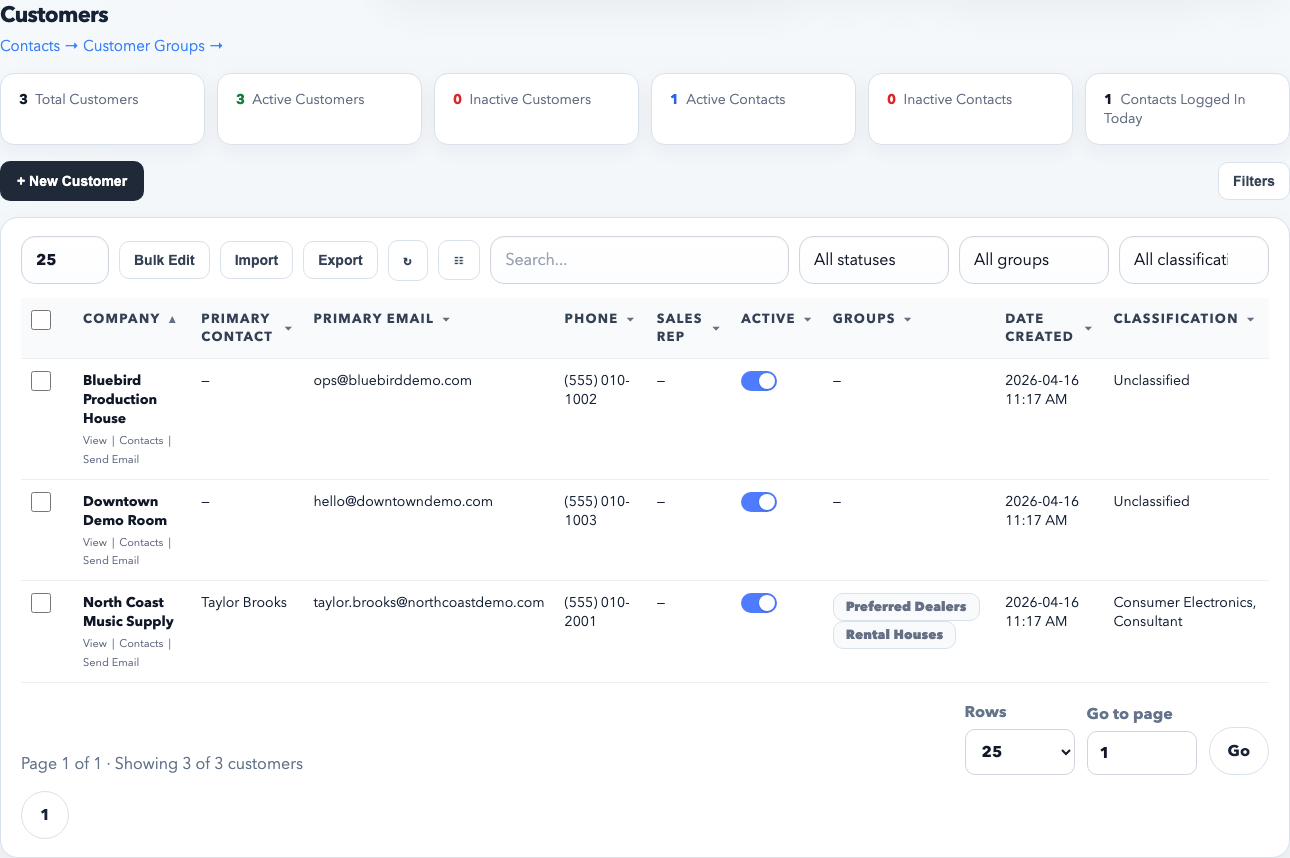
The customer directory is where you search existing accounts first, then create a new one only if the business does not already exist.
Before you create the customer
Check whether the customer already exists. Search by company name, primary email domain, and phone number before creating a duplicate.
Decide who should own the account. The assigned sales rep affects filtered views, reports, and staff access patterns.
Know whether this is an active account, lead-stage account, or inactive historical record.
Steps
Open Customers.
Click New Customer.
Enter the company name exactly as it should appear everywhere. Use the legal or operational name you want on orders, invoices, and portal pages. Do not create multiple name variants unless they are truly separate accounts.
Fill in the primary email, phone, and website if known. These fields help search and import matching later.
Set the assigned sales rep. This is important. If ownership is wrong here, dashboards, filters, and staff customer switching will be wrong too.
Set the active status intentionally. Leave the account active if the team should work it normally. Mark it inactive only if it should remain searchable but not treated as current business.
Add the customer to the correct groups. Do this during creation if possible so pricing rules, saved filters, and campaign targeting work immediately.
Save the record.
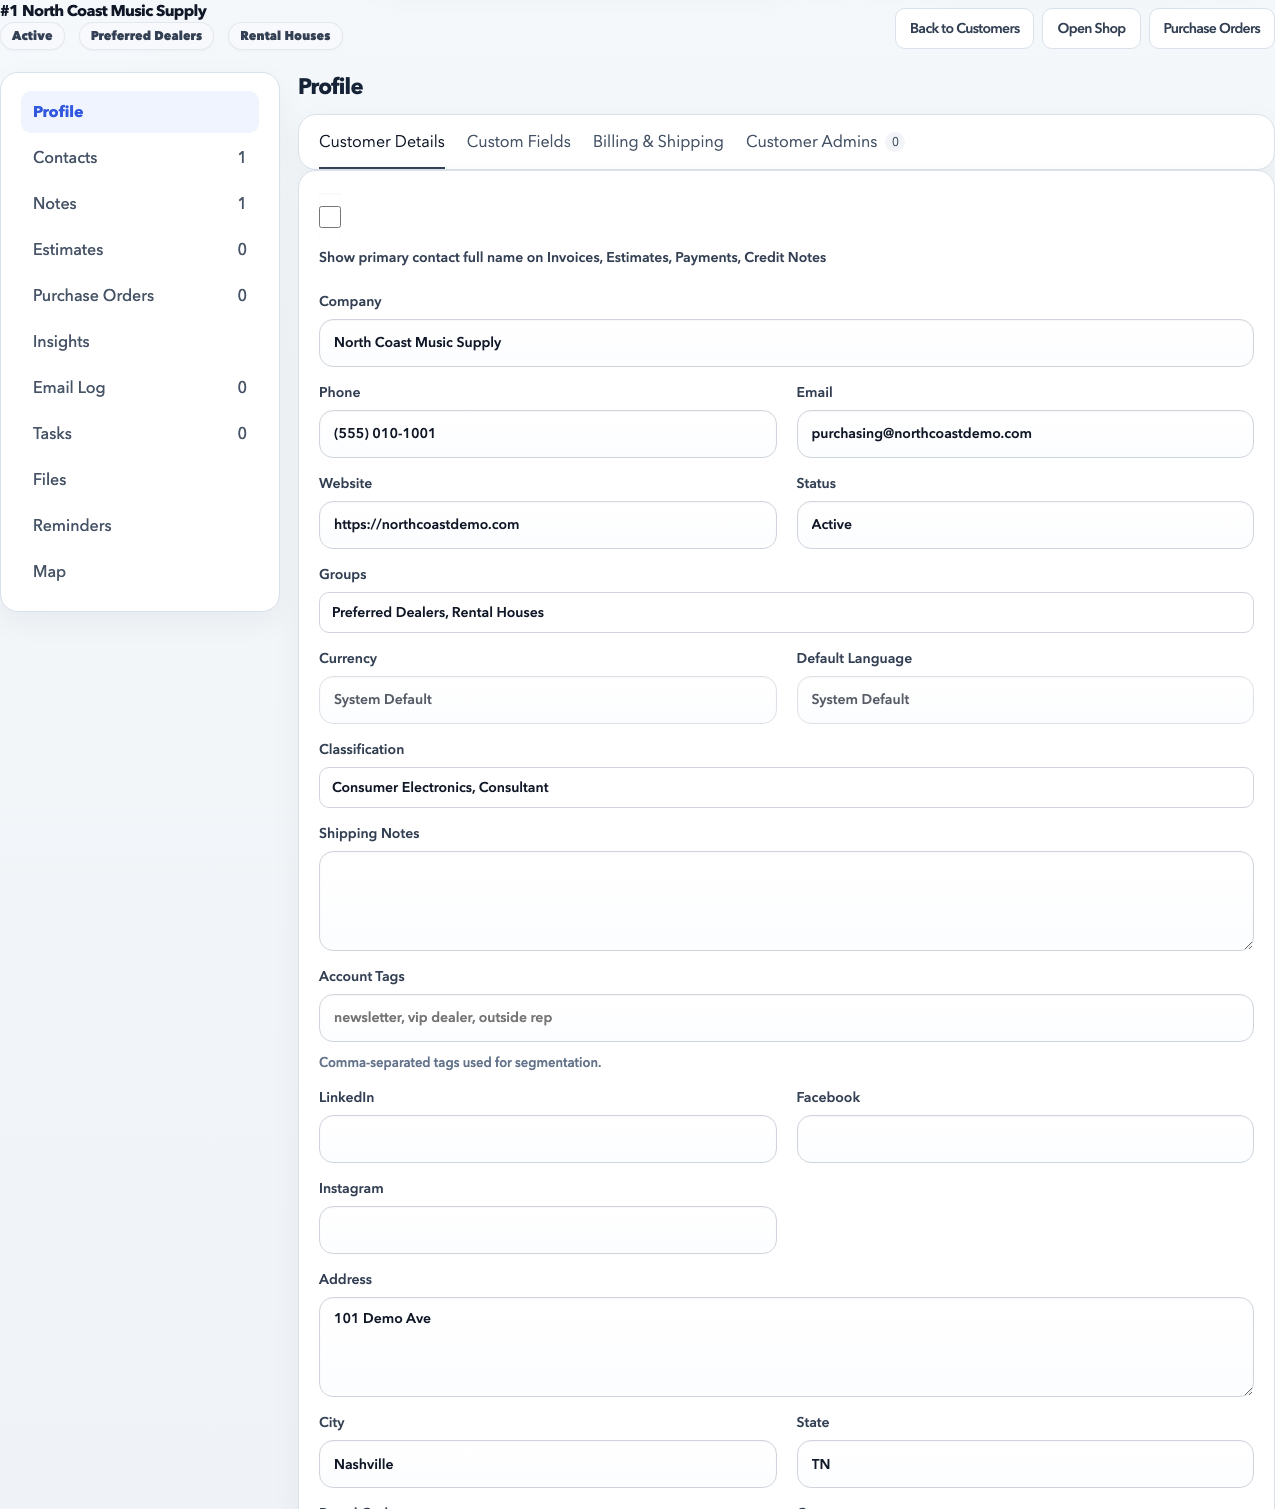
After save, review the full customer profile and correct the status, groups, classifications, and address details before the account starts being used in orders or campaigns.
After save
Add at least one contact if a real person at the account should receive emails, portal access, or documents.
Review the customer detail page and confirm the sales rep, groups, and status are correct.
If this customer needs portal access, move directly to the contact record and enable portal login there.
Best practices
One customer account per real business relationship. Do not create separate accounts for every buyer unless your workflow truly requires it.
Use groups for reporting and targeting. Do not cram segment logic into the company name field.
If you are importing customers, clean duplicates first. Bad CRM hygiene spreads into campaigns, orders, and billing fast.
Common mistakes
Creating a new customer when the account already exists under a slightly different name.
Leaving the sales rep blank or assigned to the wrong person.
Forgetting groups, which later makes pricing rules and campaign targeting look broken when the real issue is missing grouping.
Recommended Next
Add a Contact
Add contacts with the right email, portal role, and customer linkage so communication and access stay clean.